Thursday, 13 May 2010

Player of the Year!

We had some wonderful news earlier this week.  A friend of ours has a young son, 'C', who, through sheer grit and determination, has just won his soccer team's 'Player of the Year' award.  Great news, eh? And .... a brilliant excuse for a card!

Image: Mo's Digital Pencil, 'Soccer Boy'

Papers: October Afternoon, various

Other: Twill ribbon (a 'don't throw it away!' find, which originally held together a stack of tea towels!); silver boot brads from Papermania (unfortunately, two left feet!!!)


Isn't this image delightful?  He's a perfect little soccer player, and toooooo cute for words.

He was coloured with my Copics, of course and (altogether now ...) shaded with my Prismas! (You got it!)  The grass is perhaps a little long for a good soccer pitch but, hey, artistic licence!  Also, I coloured the soccer ball the 'wrong' way, i.e. I have more black than white, but I thought the other way around might be a bit washed out against the strong background.  Unbeknown to me, it appears that his away strip is a yellow jersey - how psychic must I be!?

I wanted something really bright and striking for background and this sheet from one of my October Afternoon 8 x 8 pads was just perfect.  I teamed it with a strip of starry paper and printed out and coloured a freebie 'Brilliant' star clip art.  The colours are slightly wrong in the photograph - the background for the star is actually a deep navy blue, not black, but I was losing too much of the other colour if I corrected it too much, so I left it as it was. 

Mmmmm, two left feet - hopefully 'C' didn't realise, as I put them at an angle to make it less obvious. 

I was going to stop at that - boy card and all that - but I couldn't help adding a bit of bling to emphasise his superstar status.  I used square gems (big more manly) and half outline the top left and bottom right of the two circles, and the card suddenly just 'popped'! 

Best of all, 'C' was absolutely delighted that someone had made him a 'proper card'.  Bless him. 

Thought I might enter this in the Cards for Men 'Outdoors'challenge as my second entry - hope that's allowed.  There doesn't seem to be anything in the rules to prevent me so, what the heck, I'll throw it in the mix. 

Happy crafting.
Photobucketxx

Wednesday, 12 May 2010

Helping Mum - Isabella's Challenge #7

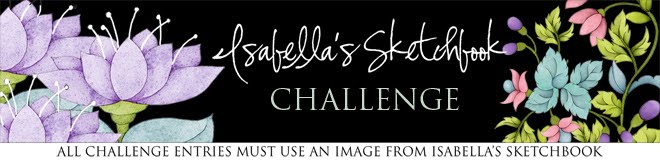
Good morning all, and here we are for this week's Isabella's Challenge, where we have been challenged to make a card using all or some of the colours in Isabella's Challenge Blog banner:


What a lovely array of colours we have to choose from!  So, without further ado, here's my 'take':

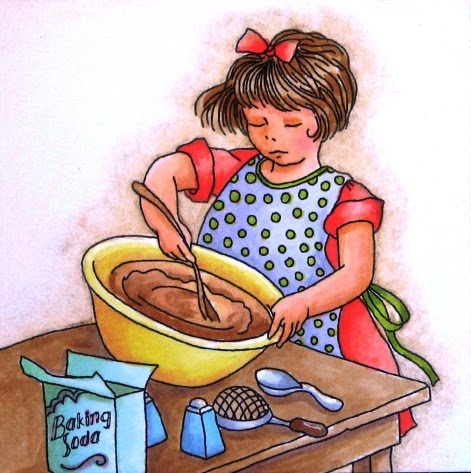
Image: Isabella's Sketchbook, 'Mother's Helper'

Papers: October Afternoon, 'Thrift Shop'

I wanted to use all the colours I could so I needed an image where this was possible and realistic.  'Mother's Helper' was perfect and so sweet.  Again, I wanted the image to be the real focal point, so I've only used two DPs and a very simple layout, which I think works very well.

I coloured her up with my Copics and, as usual, added some shading with my Prismas. 

This so reminds me of baking with my mum when I was small, although our favourite make was scones (Dad's favourite).  There's nothing quite like a fresh fruity scone with lashings of butter (how naughty)!  It's still one of my favourites, although I don't get round to baking very much these days.  Daughter seems to have got the baking gene, though - she's a real whizz at cakes and cupcakes. In fact, she made our wedding cake last year, and it was absolutely fabulous.  The sponge was light and scrumptious and the decoration was just perfect:


Didn't she do an amazing job? 

Anyway, proud mother moment aside, come and join us at Isabella's Challenge this week and let us see how you use these colours in your project.  Remember, your entry must use an Isabella's Sketchbook image so hop over to her store and have a look at all the beautiful images you can choose from.  The prize this week is two digi stamps from Isabella's Sketchbook and a beautiful 'I Won' badge for your blog.  But remember, you have to be in it to win it!! Can't wait to see your creations. 


Happy crafting.
Photobucketxx

Tuesday, 11 May 2010

Good Morning World!

We have so many ways of staying in touch with the world these days, what with the internet, Facebook, Twitter, Hotmail, etc.  I find it quite hard to keep up and, to be honest, I'd still rather pick up a phone and speak to someone than trawl through Facebook to see what they're up to.  And Twitter - well, don't get me started.  I don't think I'll ever 'get' the idea at all!

However, that said, I'm so glad to see that Mo Manning is now beginning to push her Facebook fan page, as this will open doors to even more crafters, who may not yet be aware of her amazing work.  In order to encourage us to follow her Facebook page, Mo offered a freebie for two days to all her FB fans and, of course, I was more than willing to follow Mo anywhere!  Here's what I've done with the freebie:

Image: Mo's Digital Pencil, Facebook freebie, 'Checking FB' (now available at Mo's store, here)

Papers: Cosmo Cricket, various

I'd love to be able to say that this glamour puss closely resembles me in a morning, but I'd be lying.  The only thing we have in common is our attachment to our computers! I think she is wonderful - such a brilliant idea for an image.

I paper-pieced her dressing gown and the bed/sofa then coloured up the rest with my Copics and Prismas.  She was a delight to colour and paper-piecing really gives some choice for a pretty dressing gown.


Before starting, I had a quick look for an appropriate sketch challenge and used the current Card Patterns Saturday sketch for the layout.  I also wanted to use the pink and green theme from this week's Little Red Wagon, although I've now missed the deadline (again) - I must remember to adjust my challenge calendar!  Mind you, in my defence, I've not been well for a few days now (usual stuff) so I haven't really been in the swing of things.  But, as teacher would say, 'Must try harder'!

I still have my DP2 Challenge card to do so I'd best scuttle off and colour a bit more.  That means, of course, that there'll be a double post today, so that I don't miss another deadline. 

Oh, and before I go, I'm delighted to say that I am this week's Featured Designer at Project Tuesday, with my sewing box.  Thank you so much for all your wonderful comments on this project - I'm so glad you all liked it 'sew' much!

Happy crafting.
 Photobucketxx

Monday, 10 May 2010

The Big Guy's Garden

I've recently stumbled across a challenge dedicated to the dreaded man cards: Cards for Men.  Now, as we all know, 'man things' strike dread into the hearts of most card makers: men are so difficult to create for - no flowers, glitter, pretty things - and usually it's quite difficult to find appropriate images that aren't to do with football and drinking (which none of the men in my life have any interest in).  But darling Mo Manning, she of the wonderful Mo's Digital Pencil, has made it easy for us all to create stunning man cards with her newly-created range of 'The Big Guy' images.  So, no longer afraid and, in fact, positively inspired, I thought it was time for me to enter this week's Cards for Men challenge, 'Outdoors'.

 Image: Mo's Digital Pencil, 'The Big Guy's Garden'

Papers: Cosmo Cricket, 'Garden Variety' (of course)

I love The Big Guy, in all his guises, and this one is no exception.  How many of us have a husband, father, brother who loves his garden?  I know I do.  And this would make a wonderful father's day card, I think. 

The papers were an obvious choice - 'Garden Variety' - so bold, bright and garden-inspired.  It couldn't be better.  I used a nice simple layout and balanced the sentiment with the three buttons at the bottom right. 


The Big Guy was coloured with my Copics (although I paper-pieced his overalls and just added a little Copic shading), and then I added the 'glow' and grounding with my Prismas, as usual.  I kept the colours simple and few, with just enough yellow (I think) to break up the red/green combo and to pick out the yellow in the background DP. 

So, I'm pretty confident now with my man cards - no longer shall I cower under my crafting table, a gibbering wreck, when challenged to create man stuff!  What a relief.

Happy crafting.
Photobucketxx

Saturday, 8 May 2010

Boxing Clever

Every now and then I come across a challenge that really inspires me and one such this week was the Project Tuesday challenge to make an altered box or tin.  I love boxes - I used to make them, boxes for books, for photographs, for albums, for storage - and, in fact, a large wardrobe-style leather covered jewellery box, complete with inserts, pewter door panels and mahogany knobs (all made by me) for my mother's 60th birthday, a few years ago.  (If I can find photographs, I'll post them - it's awesome!)

So I was delighted to have a go at this challenge and here's the result:

Papers: October Afternoon

Other: Small wooden box; 7 Gypsies measuring tape self-adhesive ribbon; buttons, pins, etc., from stash

I started off this project by trying to decide what I would put in the box.  My last box had been a small gardening-related project and I didn't want to repeat the theme.  So I decided that this one would be a sewing box, for the essential sewing kit, perhaps for Daughter to have in her room at university. 


I began with a small wooden box, similar to this one (because I forgot to take 'before' pictures!!!).  My version has a clever little magnetic catch on the inside lips at the front of the lid and base and, therefore, there's no bulky catch to worry about - much easier to cover. I gave the box a light sanding all over to make sure that it was smooth and then coloured all the edges, the inside lips of the top and base and a thin band around the outside top of the base, using a black Copic marker, chisel end. 

I chose co-ordinating papers from the October Afternoon 'Thrift Shop' collection and teamed it with punchy red for a good contrast.

And then I just let myself do whatever felt right - I can honestly say that there was no real plan for the decoration. 

However, when I considered the inside of the box, I thought it might be nice to incorporate a pin cushion into the lid.  So I drew a template by drawing around the outside of the lid onto plain card and cutting it out.  Then I took my compass and pencil and, using them a bit like calipers, measured the lip of the lid.  I placed the pencil of the compass on to the card and the needle of the compass tight against the edge of the template and gently ran around the whole template, trying to make sure always to maintain the needle at 90o to the template, until I had marked an even amount around the edge of the template.  I then cut off the strip I had marked out, leaving me with a template that (mostly) fitted inside the lid of the box.  I was able to use this, then, to cut out a piece of foam, which I covered in black felt and stuck (snugly) inside the lid.  The photograph above shows the inside of the box (with the lid resting on the table top) and the pin cushion nestled inside the lid.

And this is the pin cushion in the lid with the box open in the proper position.  I intend to fill the box with basic sewing stuff and hope that Daughter will like it as much as I do!

So, it's late (again) and we've had a long day.  Picked my parents up from the airport today, as they've arrived home after their month-long trip to Australia, looking very well and very relaxed!  Needless to say, there was lots of news to exchange so we stayed for dinner and then it was suddenly 9.00 p.m., time to come home and get everything ready to post.  I'm pooped and off to be, where I shall be sleeping in in the morning, with no alarm to wake me!  Bliss!

Happy crafting.
Photobucketxx